Sunday, December 23, 2012

White Chocolate Peppermint Mocha Cupcakes

We're in the home stretch now.


Tomorrow is Christmas eve. Usually that means a flurry of preparations and gift wrapping for me, but this year is different. The cookies are baked. The presents are wrapped. I've already done a mini pre-Christmas of sorts with my family in Vancouver and today we flew to Calgary to spend the holiday with the boys family. It's a different sort of Christmas for sure...

No stockings hung by the chimney. No rambunctios little brothers bouncing off the walls. No Christmas morning video cameras. No turkey and cornbread stuffing and cranberry sauce. It's a first for me and I'm trying to be open to new things. Trying to see that the spirit of the holidays lies in all sorts of traditions. Becoming a part of a new family, or trying to anyway, can be a challenging thing. I know a lot of people must be going through that around the holidays. Compromises must be made on all sides, and I know for myself, I could probably stand to give a little more. So I'm working on smiling. On being gracious. And on appreciating these people I am so lucky to have in my life and loving them for who they are. 

And of course, there are still cookies. It can't be all that bad.  


So these cupcakes... they are scrumptious little things. And I had really really REALLY wanted this post to be up days ago but, well... Something got in the way. A casserole dish to be exact.   I'm not even sure how to explain this other than that... my clumsiness really knows no bounds. It is so ridiculous. But simply put, I've spent the last few days with one heck of a headache and a mild concussion. I'm a little bit grumpy and a lot ashamed. That is all.

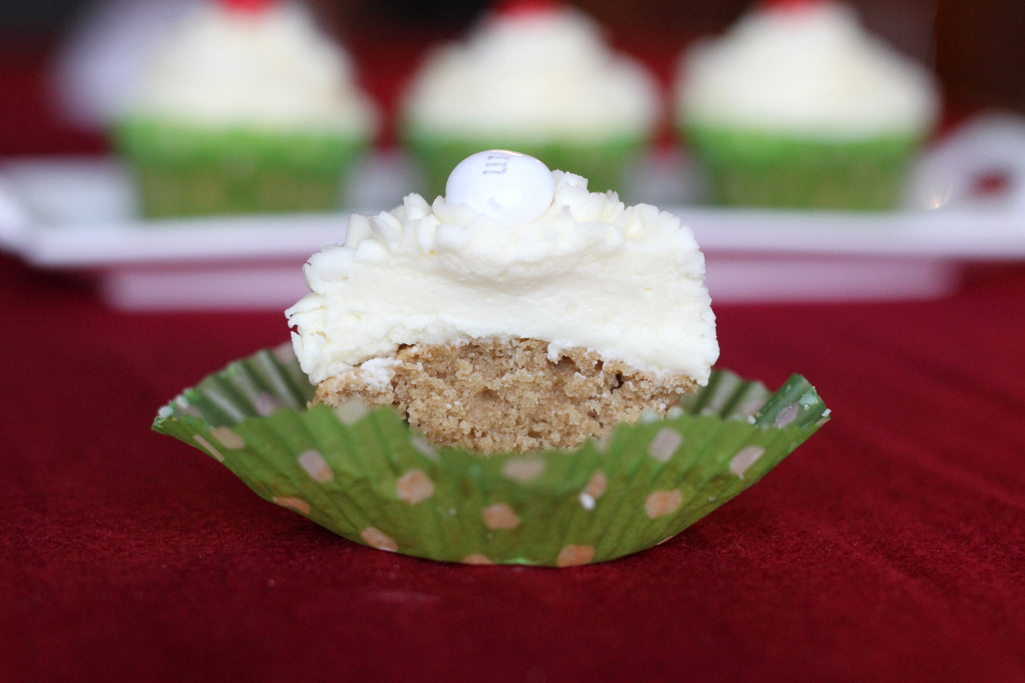
I made these little treats for a coworker who is just the tiniest bit OBSESSED with the Starbucks white chocolate peppermint mocha, and who also happens to have a December Birthday. They were quite minty, so I've dialled back the peppermint extract in the recipe below - but if you really love mint feel free to up it to 1 1/2 teaspoons, or even to replace the vanilla with more mint.  The light coffee cake counteracts the sweetness of the frosting perfectly, they were a big hit around the office. 


Latte Cupcakes

Adapted from Annie's Eats.

Ingredients

2 cups all purpose flour
1 teaspoon baking powder
1/4 teaspoon salt
1 Tablespoon instant coffee or espresso powder ( I used 2 packets Starbucks via)
3/4 cup unsalted butter, softened
1 1/2 cups granulated sugar
3 large eggs
1/2 cup brewed coffee
1/4 cup plus 1 tablespoon whole milk
2 teaspoons vanilla extract

Directions

1. Preheat oven to 350 F and line a cupcake pan with paper liners. In a small bowl, whisk together the flour, baking powder, salt and instant coffee. Set aside.

2. Combine the butter and sugar in a large bowl, or the bowl of a stand mixer.  Beat them together on high speed until light and fluffy. Add the eggs one at a time and mix until well combined. Use a liquid measuring cup to combine the coffee, milk, and vanilla.

3. Keep the  mixer on low speed as you gradually add the remaining ingredients to the butter mixture. Alternate the dry ingredients with the liquid mixture, mixing well after each addition, until batter is well combined and no lumps remain.

4. Spoon evenly into muffin wells - an ice cream scoop is great for this! Bake the cupcakes 15-20 minutes, or until a cake tester comes out clean. Let cool completely before frosting.


White Chocolate Peppermint Butter Cream Frosting 


Ingredients

1 cup unsalted butter, softened
6 ounces good quality white chocolate, coarsly chopped
1 teaspoon peppermint extract
1 teaspoon clear vanilla extract
pinch salt
3 cups icing sugar, sifted

Directions

1. Set a small bowl over a pot of simmering (not boiling) water, add the chopped chocolate and stir gently until melted and smooth. Remove from heat and set aside to cool. You can also melt chocolate in the microwave.

2. With an electric mixer on medium high speed, whip butter until pale and fluffy, about 3 minutes. Add the melted chocolate to the butter and beat to combine.

3. Add the extracts and salt, mixing well. Carefully add in the sifted sugar, in 1 cup increments, mixing on low speed after each addition. Once all of the sugar has been added, increase the speed to medium high and beat until well combined. Transfer icing to a piping bag and top each cupcake with a generous swirl of frosting, and decorations of your choice. I used white chocolate peppermint M&M's.


Merry Christmas friends! Peace and love to you and all of your families.

XOXO


Thursday, November 29, 2012

Creamy Cauliflower & Parmesan Soup

Are you ready for the holidays? I'm not so sure I'm on board yet... but since the world (aka the mall) has been thrusting it on me in full force since November 1st, I figure I might as well getwiththeprogram. I dug the twinkle lights out of the storage locker on the weekend and will hang them soon. A wreathe will go on the door, and stockings might be hung. As we are spending Christmas away, I am forgoing the tree this year.  I just can't justify all the work when we wont be around to enjoy it, ya know?

Some say this makes me a Grinch. But I do love the holidays. I just also think that minimizing the stress/work this time of year is the best gift I can give myself. What about you? Has the decorating begun yet? What about the present shopping?


One holiday tradition I can totally get behind is the COOKIE situation. My mission this year is to spend as much time as I desire in my kitchen... apron on, spatula in hand, Mariah Carey blasting in the background. Now THAT sounds like a good time. Hopefully this will become a reality.

Between all the decorating, shopping, and baking, it can sometimes be overlooked that we all still need to eat dinner. And I'm pretty sure that once you've had coffee for breakfast, cookies for lunch and wine and peanut butter cups as a midday snack, the next natural step is to combine your vegetables with sour cream and cheese and call it dinner. Soup to the rescue.  I whipped up this cozy, comforting single girl dinner last week and it was SO GOOD.  It's velvety smooth and heavenly creamy. And come on, its CAULIFLOWER. I'm pretty sure that cancels out all the calories from the cream and cheese, right?

Definitely.


Creamy Cauliflower Soup with Parmesan


Serves 4. Or one with leftovers ;)

Ingredients

2 tbsp olive oil
2 tsp butter
1 onion, diced small
2 stalks celery
4 cloves garlic, crushed
pinch of chili flakes, optional
1 medium head cauliflower, chopped into florets
4 cups stock (chicken or vegetable)
1 cup whole milk
1 cup sour cream
salt and pepper to taste
3/4 cup finely grated Parmesan cheese


Directions:

1. Heat a large pot or dutch oven over medium heat, drizzle with olive oil and add a spoonful of butter. When butter has melted throw in the onion and celery and saute until soft and opaque, about 3 minutes. Add in the garlic and chili and saute 1 or 2 minutes.

2. Add the cauliflower to the pot along with the stock. Reduce heat to medium-low, cover, and let simmer until cauliflower is softened, about 15-20 minutes.

3. Once the cauliflower is cooked, remove from heat and add the whole milk.  Next, use an immersion blender to puree the soup until completely smooth. Be sure to cover the bowl with a towel to guard against any splashing, especially if the soup is still warm. If you don't have an immersion blender, you will need to transfer the soup to a traditional blender and puree in two separate batches.

4. Return soup to the pot if you transferred it to a blender. Turn heat back to medium-low. Stir in the sour cream, Parmesan, and salt & pepper to taste. Once the soup has returned to a simmer it is ready to go.

Drizzle with garlic infused oil and more cheese, if desired. Some fresh parsley would be lovely too.   Serve with a side salad, some warm crusty bread, and perhaps a glass of wine for one.


Drinking out of a juice cup makes drinking alone totally acceptable. True story.


Wednesday, November 21, 2012

Salted Caramel Pecan Brownies

Oh, howdy friends.

Yep, I'm back after a long and unexplained absence. I won't go into detail but, long story short long... there has been a lot of change going on and I needed some time to... adjust. Those of you who know me in real life already know that a certain boy has taken a great job opportunity in Seattle, WA. Hooray for jobs! But also... boo! Seeing as I don't live in Seattle, and my going with him was not an option, that left me here all alone.
  
 
Yes, I'm a big girl. And yep, I can look after myself. But darn, this long distance thing is tough. And we're only four hours apart, I can't imagine if it were any further! But if were being real? My crazy girl brain needed some space to get used to the idea. And that meant that this little blog slipped off the priority list. That makes me sad. You know what doesn't make me sad? How many people KEPT ON READING IT! I checked in the other day and saw that tons of you are still dropping by to take a look at things I've made and ... wow. Just wow. This gives me so much motivation to keep on blogging, so thank you!
Anyways...  I've found at least one major upside to having a second residence in the US of A. And that is Trader Joes, of course! Oh dear, do I ever love that place. Why oh why dont we have any in Canada? If you have never been, let this be a warning: Your first experience may be an overwhelming one. You will dart around the store like a crazy person. You will throw anything and everything into your cart. You may get whiplash looking from isle to isle. Afterwards, you will gorge yourself on cookies and chocolate-covered-everything and you will feel sick.
Just me? Oh.

One thing I picked up on the last trip were these crazy little Fleur De Sel Caramels. I am a goner for anything sweet and salty, and I knew from the moment I bought them that these were destined to be combined with chocolate and baked into something delicious. Brownies to the rescue! I mixed toasted pecans into brownie batter, dotted the top with the little caramels, baked them up and sprinkled with sea salt. BAM! Ooey gooey salty sweet brownies. Dig in!


Salted Caramel and Pecan Brownies

Adapted from S'mores Brownies from the Joy the Baker Cookbook.

These are moist cakey brownies, studded with pecans and melted caramel centres. If you can't get your hands on the TJ's caramels, any soft candy should do really. Or you could try marbling the top with a liquid caramel sauce. Enjoy!

Ingredients
1 cup unsalted butter
6 ounces unsweetened baking chocolate, chopped
1 1/2 cups all purpose flour
2 teaspoons baking powder
1 teaspoon salt
1 teaspoon instant espresso or coffee powder
1 1/4 cups brown sugar
1 cup granulated sugar
5 large eggs
2 teaspoons vanilla extract
1 cup toasted pecan halves, chopped
12 Trader Joes Fleur De Sel Caramels, or similar candy

1 tablespoon fleur de sel or course sea salt
1 tablespoon granulated sugar


1. Preheat oven to 350. Butter a 9X13 pan. I did not line my pan with parchment, but I think I would do this next time, to prevent sticking. Set a heatproof bowl over a pot of simmering, not boiling, water. Add the chocolate and butter to the bowl, stirring until the mixture is fully melted and smooth. Remove from heat and allow to cool slightly.

2. Whisk together the flour, baking powder, salt, and coffee powder. Set aside.

3. In a large bowl or stand mixer, beat together the eggs, sugar, and vanilla. Gradually add the chocolate mixture to the eggs, taking care not to let them cook. Next, add the dry ingredients 1 cup at a time and mix until well combined. Fold in the chopped pecans. 

4. Pour batter into prepared pan. Unwrap each caramel candy (the most labour intensive step in the recipe, without a doubt), and roll between the palms of your hands to form a ball. Place the 12 caramel balls on top of the brownie batter. 

5. Bake for 30-40 minutes, or until a skewer or cake tester comes out almost clean. In a small dish, combine 1 tablespoon fleur de sel with 1 tablespoon sugar. Use fingers to sprinkle as much as desired across the top of the finished brownies. 

These are best enjoyed warm from the oven, or zapped in the microwave just long enough to melt the caramel. They would also be RIDICULOUS with a scoop of vanilla ice cream. Oh man, why didn't I think of that when I still had some?!

I know that today is a big day for all the American readers out there. And although our Thanksgiving came and went last month, I will be attending an American's-in-Canada-Friends-Giving this weekend. I will be whipping up the pumpkin cream pie from last year, because the boyfriend loves it so, plus a savoury dish I'll hopefully share on here soon. Happy Thanksgiving!

And here is a rainbow. Because today, I'm thankful for rainbows.


Friday, September 14, 2012

End of Summer Plum Cobbler

Oh, hello there.


Is that not just the cutest little plum you've ever seen?


We picked up these little guys on labour day weekend, at a farm stand in B.C.'s beautiful Okanagan... along with some peaches, apples, cherries, corn, and tomatoes! Weeee!

I can say I have thoroughly enjoyed our provinces produce offerings this year. All month there have been peaches in my oatmeal, simple tomato sandwiches at lunch, and sweet creamy corn chowder for dinner. We're loving it. Well OK, I'm loving it. The boyfriend not so much since he hates both oatmeal and soup... and prefers his sandwiches with bacon.

Oh well, more for me!


I don't normally like plums, with their bitter skin and tart juices. But end-of-august-plums seem to be a different breed. So sweet and juicy Ican'tevenhandleit. And topped with fluffy little biscuits that also happen to be gluten free? Shutup. It's the perfect dessert to bridge summer and fall...

Serve with creamy vanilla bean gelato. It will melt and mingle with the plum juices to form a heavenly sauce.

Eat outdoors, in order to soak up the last bit of September sunshine.

Bring a sweater. 

Mourn summer.

Go make soup.


Summer Plum Cobbler with Gluten Free Biscuit Topping


Adapted from How to Cook Gluten-Free by Elizabeth Barbone. I just received this book off amazon and can't wait to try out more recipes! It is a fantastic "basics" guide for anyone starting a gluten free diet.

Plum Filling Ingredients

6 Cups ripe plums, pitted and (large ones) sliced
3/4 Cup white sugar
1 Tablespoon Cornstarch
1 Teaspoon ground cinnamon
1 Tablespoon fresh lemon juice


Biscuit Topping Ingredients

1 Cup tapioca starch
2/3 Cup white rice flour
1/3 Cup cornstarch
1/4 Cup granulated sugar
1 Tablespoon baking powder
1/2 Teaspoon salt
6 Tablespoons unsalted butter
3/4 Cup  heavy cream


1.  Preheat oven to 400F. Butter a baking dish - the recipe calls for 9X13, while I opted to use a 9X9 square dish. Pit and slice the plums, I used an assortment of red, purple and yellow plums of various sizes.

2. Toss plums with sugar, cornstarch, cinnamon, and lemon juice. Stir to combine and pour into prepared dish.

3. For the topping, combine the dry ingredients in a large bowl. Add the butter and use your fingers to work it into the dry ingredients until little pebbles form. Add the cream and stir until the dough holds together, adding additional cream if needed. The dough will be fairly sticky.

4. Roll the dough into golf ball sized pieces and place on top of the fruit mixture, leaving a bit of space between them. Bake until biscuits are puffed up and lightly browned, about 30-40 minutes.

Let cool, serve warm or cold. Makes 6-8 servings.

In other news, my 1 year "Blogiversary" passed last week. I threw no party. Held no contests. Baked no cake (although I wish I had). But it was noted fondly that 1 year ago I decided to start sharing my random thoughts and recipes with strangers on the internet. It has been fun, and I hope to do it for years to come. Just as I hope to learn and grow and get better at it.

Time for a little blog re-design in honour of her Birthday? I think so!

Happy weekend foodie friends!

XO


Thursday, August 16, 2012

Chocolate Coconut Brownie Ice Cream Bars


Craving something cold and sweet to help you wind down the last of these sticky summer days?

'Cus I know I sure am. 


Or maybe you're looking for something a little different, a little decadent, to impress your friends at your next gathering?


This might just work.


Bonus, if you've got friends or family with allergies, who normally can't take part in the dessert table... you know, the ones who sit pouting in the corner when the birthday cake is cut? (Not guilty).

This is a super easy way to put a smile on their face. With a few tweaks here and there, it can easily be gluten free, dairy free, or even vegan.


I wouldn't call this a recipe so much as... an idea. It's stupidly easy, you can customize it to no end, and the results are nothing short of AMAAAAZING.

In my humble opinion.


I totally cheated on this recipe, I made the brownies from a mix and used store bought ice cream. I don't think this compromised its deliciousness in anyway, but if you are more ambitious than I, you can go right ahead and make all the components from scratch and then combine them as I did. In fact, please do! But make sure to invite me over :)

If you go the lazy route like I did, just use your favourite brownie mix and ice cream flavour. I used this mix from Pamela's Product's and the Cappuccino flavour of Luna & Larry's Coconut Bliss ice cream, which tastes like my most recent Starbucks obsession, coconut lattes! All of my ingredients were free of gluten and dairy. To make it vegan, you can probably just use an egg replacer instead of the eggs in the brownie mix. Or go ahead and use all the eggs and butter and real cream you want, it's your dessert!


Chocolate Coconut Brownie Ice Cream Bars (Gluten and Dairy Free Optional)


Ingredients:

1 Batch of brownies, from scratch or a mix - baked and cooled
1 Pint or 2 cups ice cream, softened slightly
1 Cup coconut chocolate ganache, recipe below
1 Cup unsweetened shredded coconut, toasted

1. Bake brownies according to package directions at least a few hours in advance, I recommend doing this a day ahead, and allow them to cool fully. I baked mine in a 7X11 Pyrex, but an 8X8 will work too.

2. Use a spatula to gently spread the softened ice cream in an even layer over the brownies, cover and place in the freezer until firm, about 2 hours.

3. While the ice cream is in the freezer, whip up the ganache and leave to cool. At the same time, toast the coconut in a pan over low heat, until just golden brown, and set aside.

4. When the ice cream layer is frozen solid, pour the coconut ganache over the ice cream as evenly as possible, use a spatula to guide it to the edges and into the corners. As you can see, my ganache was still a bit warm and melted some of the ice cream, so my layers aren't perfect. Don't worry if yours are a little wonky too, it still tasted great.

Sprinkle with as much or as little of the toasted coconut as you'd like, then cover and freeze the whole thing until the ganache is set, at least 1 hour. Remove from the freezer and thaw until it is soft enough to cut. Divide into squares, serve and enjoy!


Chocolate Coconut Ganache (Dairy Free)


Ingredients:

16 Ounces dark, dairy free chocolate
1 (15 Ounce) can full fat coconut milk

1. Chop the chocolate into rough chunks and place in a heat proof bowl, set aside.

2. Heat the coconut milk over medium low heat until it begins to steam and bubble at the edges, remove from heat just before boiling. Pour the coconut milk over the chocolate and let stand for 5 minutes before stirring. Beat with a whisk to combine, until the chocolate mixture is smooth and glossy. Refrigerate to cool.


You know what I'm thinking? Chocolate Peppermint Chip Brownie Ice Cream Bars. Yes please.

Wednesday, August 1, 2012

Honey Lime Grilled Salmon with Fresh Fruit Salsa


This recipe is inspired by (slash-stolen-from) one of my favourite bloggers - Jessica at How Sweet It Is. Jess if you read this - imitation is the sincerest form of f-OMG I CAN'T BELIEVE YOU'RE READING MY BLOG I LOVE YOU!!!

Ahem.

Sorry. I'd better stop before this gets embarrassing. See, when it comes to food blogs and me, "following" is really just another way of saying "stalking". I can get a bit... obsessed. Just a bit. I can't even begin to imagine what I would do if I MET my blogging idols - pass out?

Oh right, that happened. Hi JOY!


But seriously? How could you not love someone who comes up with things like Bourbon Marshmallow Smores with Bacon? For real. Also, I feel like we have a lot of things in common - mainly a nostalgia for/love of any and all things 90's. Plus an obsession with the show Girls and an aversion to doing dishes. And then theres that whole food thing... yeah I kinda like it too.

Most importantly, I have to thank Jess for bringing something as amazing as fruit salsa into my life. WHY did I never think of this before??? It's ridiculous. After procrastinating forever I finally made up a batch in my food processor last week - it took all of about 20 seconds - and holy cow this stuff is delicious. And addicting. And delicious.


Tip: If you are like me and get squeamish with salmon skin, this is a great way to grill a lovely, moist skin-on filet, and leave the skin behind on the grill. Works with pretty much any fish! Listen up. Start the fish skin side UP on the grill, flip it over half way through cooking time so that the skin side is DOWN. When the fish is cooked all the way through, take the edge of a metal spatula and gently wiggle it between the flesh of the fish and the skin. If the fish is fully cooked, it should slide easily onto the spatula, leaving the icky skin behind on your grill. Ta daa! Now just make sure you get a grownup to clean the grill for you.

Now get grillin!


Honey Lime Grilled Salmon with Fresh Fruit Salsa

Inspired by Honey Lime Tilapia by How Sweet It is.

Ingredients
2 Salmon filets 
1 Tablespoon olive oil 
2 Tablespoons honey
Juice of 2 small limes
Zest of 1 lime
1 Garlic clove, crushed
1/2 Teaspoon salt 
Additional honey and lime juice for drizzling

1. Place the salmon in a dish or container. In a small bowl, combine the ingredients for the marinade, whisk well and pour over top of the fish. Cover and refrigerate for about 30 minutes to 1 hour.

2. To grill the salmon, preheat your grill to medium high, brush the  grates clean and lightly oil them (I use olive oil in a mister) then place the salmon skin-side-up on the grill, and close the lid. After about 4-5 minutes, depending on the thickness of your fillets, the fish should begin to turn opaque. Use tongs to gently flip your fish over so that it is now skin-side-down. Give it another 3-5 minutes on the grill, until the salmon is completely opaque. Much longer and you risk drying out the fish. As I said above, you can keep the skin on, or you can remove it by gently sliding a spatula between the fish and the skin, leaving the skin behind on the grill.

3. Combine about a tablespoon each of honey and lime juice in a small bowl and drizzle over the freshly grilled salmon.


Blueberry Lime Salsa

By How Sweet It Is. 
This recipe is pretty much a replica of Jessica's Salsa. The only difference is that I left out the avocado, since I'm a weirdo and couldn't handle combining all these textures.

Ingredients
1 Cup fresh blueberries
5-7 Strawberries
1/4 Red onion, roughly chopped
Juice and zest of two limes
1/3 Cup cilantro leaves
Salt and pepper to taste

Combine all ingredients in a food processor or blender and pulse, about 5-6 times or until you reach a desired consistancy. Taste and season with salt and pepper if desired. Makes about 1 1/2 cups.

Top the salmon with a generous amount of fruit salsa. Serve on a bed of black rice. Because its purdy.


Tuesday, July 24, 2012

Insta-Summer

Loving right now: Fun Manicures. Bright pink blush. Pomegranate Mojitos. Coconut ice cream. Florence + The Machine. Tacos tacos tacos. Reading Wild. Pomegranate mojito popsicles (it happened). The Everygirl. Easy homemade iced coffee a la Pioneer Woman. Big summer salads, currently craving this one and this one. The wonderful awkwardness that is Girls on HBO. And apparently... Lime Margaritas. Although I may need to take a little break from those.


Not loving? This rain!